
| The Helicopter Autorotation |
| 送交者: 2018年01月04日02:02:04 于 [世界军事论坛] 发送悄悄话 |
|
|
|
http://helicopterflight.net/autorotation.php The Helicopter Autorotation
See also: FAA AC 61-140 and IHST Real Autorotations and FAA Planning Autorotations. Always remember that flight training is serious. It's not a joking matter especially when practicing autorotations. In aviation you'll hear the term "pucker factor", from time to time. It could be bad weather, it could be turbulence, or it could be any number of things. If you really want to raise a students "pucker factor" just say, "Autorotation". Why do students fear autorotations? Usually it's because they're associated with emergencies. In some cases it may be because they've read articles that refer to the H/V Curve as the "dead man's curve". I personally don't like the latter term as it's slang that leaves a false negative impression. Read about how the H/V Curve is developed. Students should understand that during flight training autorotations are practiced to simulate emergencies, it's never acceptable to create a real emergency by actually shutting down the engine.&enspIn most cases where an accident occurs during a practice autorotation, it's due to the fact that an uncomfortable feeling existed in the first place which resulted in apprehension which in turn results in tenseness on the controls. This should be talked about before any flight session which will include practice autorotations. If the student is excessively tense, then it's probably best to wait till later; this may not be a good time to practice a critical maneuver. Though many instructors want to introduce autorotations early in training, it is beneficial to put them off for a few hours 'til the student becomes more comfortable overall. I've taught in several different helicopter makes/models, but no matter what I'm flying, I always teach the same way. Some items relative to the helicopter will vary such as airspeeds etc, but the way I teach never varies. I also teach the Robinson Awareness Training required by SFAR 73 to every new student regardless of the aircraft we'll fly; mostly because it is just a good idea, and also because knowledge is always beneficial. Robinson, through their safety bulletins have cautioned against throttle chops while practicing autorotations, and I support this caution. It's far better to relax the student with conservative entries to the autorotation in the beginning, and then increase the speed of entry as time progresses and the student becomes more comfortable. Chopping the throttle and slamming the collective down is poor technique, yet many pilots think that is how you should it. Using this method unloading the rotor in a two bladed helicopter as many flight instructors teach autorotations isn't safe either. From the beginning - When teaching a student autorotations, I begin by entering the autorotation very conservatively and then increase the rate of entry slowly to permit the student to become comfortable with the maneuver. I always begin by setting up a longer than normal approach at about 1200-feet AGL and at an airspeed just above the best autorotation airspeed. This setup will eliminate any aggressive control inputs on entry, and will permit the student time to see what actually takes place. The entry to an autorotation should always include an aft cyclic input which prevents the unloading of the rotor, and also aids in keeping the rotor rpm from decaying excessively.
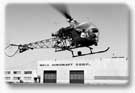
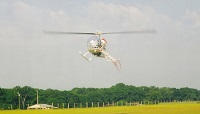
In the photo, this was a Bell 47 G5 I owned in the late, 90s, in autorotation flare at the Jumbolair (Greystone) airport, Ocala Florida where I was based at the time. It is also good for the student to just lightly follow the instructor on the controls to feel the proper inputs. Enter the autorotation by lowering the collective smoothly all the way down, and then roll off the throttle for a tack needle split, make sure the throttle is at idle. In many helicopters it will be necessary to raise the collective slightly to capture the rotor rpm in the top of the green arc. As with the entry, the termination should also be conservative. Smoothly roll the throttle back up to marry the needles as you pass through about 300-feet AGL; then complete the termination by bringing the helicopter to a hover at a normal height. There should not be any need for aggressive control inputs. Everything should be smooth and there should be a lot of talk from the instructor as he/she describes everything in detail as it is being accomplished including the instrument scans. Four Crucial Elements of a Successful AutorotationAirspeed - Airspeed is often stressed as being one of the single most important aspects of a successful autorotation. It depends upon who you are talking to at the time, others may say something else like the flare for example. Initially we desire to be at or above the optimum autorotation airspeed prior to entry. This is a best case scenario which is the easiest to execute, and very safe because of the fact that there is so much leeway. The published autorotation airspeed is the optimum which will allow for the best overall autorotation performance. What is often not taught, or even known for that matter, is the fact that almost all helicopters will achieve best glide (longest distance) at an airspeed up to 25-30% greater than the published airspeed for minimum descent. Also, it is true that almost all helicopters can be autorotated for a steeper approach at an airspeed of up to 25-30% slower than the published airspeed. Why then, are these techniques not taught? First because these facts are usually not known, and secondly if they are known, it is not taught until a student has achieved a particular level of skill because these are advanced techniques which require extreme precision. Although I may demonstrate these techniques because I want to plant the seed for future use by a student, I do not teach them until a student has demonstrated an excellent level of control which usually does not come until commercial level training. If I feel that a particular student is not responsible, I will never teach any advanced technique. For more on this topic, see advanced technique later in this text. Rotor RPM - This is the single most important ingredient of a successful autorotation. Without sufficient rotor RPM you will become something like a brick. In the event of an actual engine failure, you have a very limited amount of time to get the collective fully down to regain any lost rotor RPM, and there will be some to gain. Once the collective is fully down, it must be manipulated to maintain acceptable rotor RPM in the green arc. In the event of a light aircraft, it may be necessary to maintain the collective in a full-down position just to keep the RPM in the lower limits of the green arc, and in other cases such as a heavy aircraft, it may be necessary to increase the collective pitch to control an over-speed tendency. As with the airspeed, there is an acceptable range, however the RPM must always be within that range specified in the relative RFM (POH). I used to say the rpm should be maintained within the green arc, but you will notice that the green arc in some aircraft is smaller than that rpm range which is acceptable for best glide autorotation. This can result in the warning horn sounding continuously, and if this case you must be extremely cautious in that you do not become to accustomed to its sounding and forget to closely monitor your rpm visually. Landing Zone - This is a very important aspect of any forced landing, especially with regard to helicopters. Note that from an altitude of 500-feet AGL, you will be on the ground in just 20-seconds therefore there is no time to seek a suitable landing area after an engine failure occurs. For the purpose of practice autorotations, an airport runway should always be used. If during an engine failure you do not immediately turn to your landing area and keep it in sight you will not likely get to it. It is also important that you do not try to reach a landing area that is simply out-of-reach. Many accidents have occurred as a result of trying to extend a glide to a landing area that is impossible to reach. Always remember that it is far better to make a good autorotation to a bad landing site than to make a bad autorotation to a good site. If in doubt, take something closer even if it is trees, but make a good autorotation. The Flare - This is where your descent rate and airspeed are used to set up your touchdown. A Bell factory pilot told me one time, 'if you don't do anything else, flare'. If you have set up a stabilized autorotation, there is a tremendous amount of energy stored in your descent and airspeed, and at your disposal for the termination. During the flare, the rotor rpm will increase usually quite significantly. The Last 100-FeetIf you did everything right as discussed above, all you have to do now is flare and pull the collective but it must all be at precisely the right time. This last 100-feet only lasts about 5- to 6-seconds, and is the slowest part of the autorotation. Termination to a power recovery - If you did not begin to increase the throttle as you passed through 300-feet, then as you initiate the flare, and before 10-feet AGL, smoothly roll the throttle up to marry the tachometer needles. Do not wait until you are ready to apply the collective to roll up the throttle; this will cause an over-speed, and a strong yaw. During practice autorotations to a power recovery, it is perfectly acceptable to roll up the throttle anytime after 500-300 feet AGL. It is important that the throttle is rolled up smoothly. As you pass through 10-feet AGL, increase the collective to bring the helicopter to a hover. Some teaching variations occur in this termination. Some instructors will teach to bring the helicopter to a stable hover with no forward speed. If this technique is taught, it is necessary to terminate with a tail low attitude as the helicopter is brought to a hover with aft cyclic. I do not approve of that technique because in the event of a real failure, this will result in a tail boom chop. I teach to level the helicopter as the collective is increased, and accept the forward movement just as you would in a real failure. Then if you desire you may slow the helicopter to a hover, or you may go around for another. Termination to the Ground - As you pass through the last 10-feet of the autorotation, you must level the helicopter and apply the collective at just the right time. Just the right time will be about 3-feet AGL. It is imperative that you level the helicopter (forward cyclic) and then do not make anymore aft cyclic inputs. It is desirable that you have 20-knots or less ground-speed at this time. If this is a real failure, you must accept what ever speed you have and keep the cyclic forward. The only thing that aft cyclic will do at this time is shorten the tail boom. The technique for collective application may vary with pilot technique and/or the helicopter that you are flying. In a Robinson R22 for example, you will apply the collective fully and smoothly as you pass through 3-feet. In a Bell helicopter which has a higher inertia rotor, a good technique is to pop the collective slightly, then smoothly apply the collective as needed for the touch down. Ultimately, either technique will work in any helicopter when accomplished properly. DO NOT put the collective back down aggressively during the ground slide. Instead maintain the collective position as the helicopter slides to a stop or slowly lower it. In some cases it is preferable to keep increasing the collective during the slide if any is available. Abruptly lowering the collective while on sticky ground can cause a rolling forward condition if the skids stick. DO NOT input aft cyclic during the ground slide, it isn't going to do anything except maybe chop off the tail boom. Review some options in autorotation.Minimum rate of descent: This configuration is desirable if you need to maneuver to a landing site that is close to you. In this scenario, you have set your airspeed to the best rate of descent, and now you are maintaining the rotor rpm in the green arc; you will have the minimum rate of descent that you can possibly achieve in your current configuration, and you may have more time to maneuver to a close landing zone. Note that this is NOT the best distance scenario! This will simply give you your best time in the descent, but you will not be covering much ground. Note that while in autorotation, your sink rate will vary between 1,300 and 1,800 feet-per-minute. Best glide: This configuration is desirable if you were over bad terrain at the time the failure occurred and you really needed to get to better ground. Here you will adjust to the best glide airspeed simultaneously as you adjust the collective to set the rotor rpm to that which is specified in the RFM as the best glide rpm. Note that during the termination from a best glide configuration, you can and should lower the collective in the flare which will result in some rpm gain and which will also aid in the termination. Important: In the event of an actual failure as well as during practice, it is imperative to always set a stabilized autorotation first, then adjust to the configuration you desire. There may not be time to adjust as is usually true with low time pilots. Always set the optimal airspeed and stabilize the rpm in the green arc then adjust from there if time permits. What you see is what you get: As a student or low time pilot who is building skills it is important to understand that a stabilized situation is the primary objective. This never changes, however the time it takes to become stabilized decreases as experience increases. Once you have descended through 300-feet AGL, it is to late to change what you have in the event of a real emergency; it is now what-you-see is what-you-get; just keep it stable. During practice autorotations, at 300-feet AGL you must either be stabilized, or you must smoothly abort the autorotation (smoothly increase throttle to set top of the green rpm, then increase collective to go-around). In a real life failure, at this point (300-feet AGL) you must focus on making the best of what you have. Early Abort: When practicing autorotations, it is important to recognize an unstable autorotation and abort it early. Don't continue an unstable autorotation to an unstable termination or crash. Abort an unstable autorotation immediately, as soon as you notice the instability or hunting conditions and come around for another attempt. Why is the autorotation Vne different from the powered flight Vne? In training aircraft there is usually no difference and you will not likely be aware that in some aircraft there is a different Vne for autorotation. Autorotation Vne is usually marked on the airspeed indicator of a helicopter by a blue radial line. This exists on larger helicopters which are usually faster than training aircraft. Take the Robinson R44 for example; this aircraft has an autorotation Vne of 100 knots, and is depicted by the blue radial line on the airspeed indicator. The Bell 206 Jet Ranger is similar. Remember that the up-flow of air through the main rotor is what drives the rotor system while in autorotation. If your airspeed is to high, you will not be able to achieve sufficient up-flow, and the rotor rpm will decrease. Advanced Autorotation TechniquesOnce a pilot becomes comfortable with autorotation, and once he or she sees and understands that the helicopter does not fly any different in autorotation than it does in powered flight, then these techniques can be taught, used, and experimented with. I do not mean that you should experiment with anything untested, or not demonstrated to you. It is better that you have a qualified instructor sitting next to you who can keep you within the margins of safety. Never let yourself become a test pilot before your time! Airspeed - A helicopter will autorotate at any airspeed (below autorotation Vne). This means that it will autorotate just fine at zero airspeed, however you will have a high rate of descent. This higher rate of descent is acceptable provided that at the right time (above the H/V Curve), you gain the airspeed necessary for a reasonable flare and/or touchdown. This airspeed is best at or above 45-knots to make a safe and non-destructive landing however the skill level of the pilot must be higher than that of a student or private pilot at these lower airspeeds. The helicopter can even be flown backwards in autorotation with no dangers other than the fact that you must gain forward airspeed prior to touchdown. You must also keep in mind that rotor rpm can decrease significantly especially with forward cyclic inputs while manipulating the cyclic utilizing advanced autorotation techniques. Maneuvering - The most important thing to remember when it comes to maneuvering in autorotation is to do your maneuvering early especially when practicing 180 degree autorotations with students. Get stable and make your turns. A helicopter is no less maneuverable in autorotation than it is in powered flight. The only thing you must do, is maintain rotor rpm within the acceptable range, and fly the helicopter to where you want to go. It really is as simple as that. Never stop flying the aircraft. RPM - What controls rotor rpm during autorotation? The collective right? What else? The collective directly controls rotor rpm through the pitch of the rotor blades. The cyclic also controls rotor rpm through disk loading. If you will maintain a straight-in autorotation, the collective is the only means of rpm control. If you will make any turns, depending upon how steep, you may have to manipulate the collective to prevent an over-speed. This is because you have increased the g-load on the rotor disk in the turn which increased rotor rpm. If you input forward cyclic, you will decrease the g-load on the rotor, and rotor rpm will decrease as well. Caution must be used when a forward cyclic input is made due to the fact that a rotor rpm decrease of 5% or more will occur. Here is a scenario for you to answer - While flying along by yourself at an altitude of 1,200 feet AGL and at 80 KIAS, suddenly and without warning, your lose your engine. Thanks to good training, you promptly lower the collective to the stop, but much to your surprise the rotor rpm remains in a decreasing trend which is now less than the lower limits of the green arc. What will you do to regain that lost rpm? Most will answer flare, will this work? What do you think? Answer to: info@helicopterflight.net I will respond to you with the correct information. Does a little more altitude really make much difference? Yes it does, and there is no argument against this fact. Each 100-feet of altitude will add approximately 4-seconds to your glide time and every second counts. This means that if you normally fly at 500-feet AGL, and you increase your altitude by just 100-feet to 600-feet AGL, you will increase your potential glide time by 20 percent. A 20 percent increase in glide time for 100-feet of increase in your altitude is a BIG difference. END. Back to Top |
|
|
|
|
 |
 |
| 实用资讯 | |
|
|
|
|
| 一周点击热帖 | 更多>> |
|
|
|
| 一周回复热帖 |
|
|
| 历史上的今天:回复热帖 |
| 2017: | 辽宁舰舰载机已经能在5级海况中靠机载设 | |
| 2017: | 德国出版注释版希特勒《我的奋斗》再次 | |
| 2016: | 杭州湾将建2条跨海铁路桥 或通时速350公 | |
| 2016: | 日外相:对中国在南海校验试飞“严重关 | |
| 2015: | 专家:美国衰落与中国崛起无关 美国自己 | |
| 2015: | 看来我说解放军某些观念落后的话让驭风 | |
| 2014: | ​米四位中国事务分析师:对于 | |
| 2014: | 歼-11航电全国产 5年内中国就能吃透苏- | |
| 2013: | 有点不好的感觉,和上一届很像 | |
| 2013: | 一张图;虽然转来转去 但为之感动 | |
|
|